Normal Maps in 3D Modelling
In 3D production, there’s always a trade-off between visual detail and performance. High-quality 3D models, especially those created through photogrammetry, can contain millions of polygons and ultra-high-resolution textures. While this level of detail is ideal for offline rendering or marketing visuals, it quickly becomes impractical for use in real-time environments like games, AR or web applications due to the heavy computational load. To make models more manageable, 3D artists often reduce their polygon count through a process known as mesh simplification or decimation. However, this raises a new problem: how do you not lose all the fine surface details that were captured in the scan, when the underlying geometry is stripped away? This is where normal mapping comes in.
Normal mapping allows creators to project the intricate surface detail of a high-polygon model onto a lower-polygon version, using a special texture map that influences how light interacts with the simplified surface. The result is a model that appears just as detailed, but is far more lightweight and performant, requiring much less computational power to run.
How Normal Mapping Works
Normal maps contain the model's surface information in the form of a colorful image. This image is composed of RGB values, which correspond to X, Y, and Z vectors. While this may sound complicated, it essentially just communicates how light should bounce off each part of the model. When a normal map is applied to a simplified model, the renderer uses the map to simulate the fine details of the original surface geometry during lighting calculations. This gives the illusion of bumps, creases and other intricate features without adding any extra polygons.
Photogrammetry to Normal Mapping
In photogrammetry, models are often generated with extremely high polygon counts to accurately reproduce real-world detail collected from high-resolution images. Here's how normal mapping can be integrated into the process:
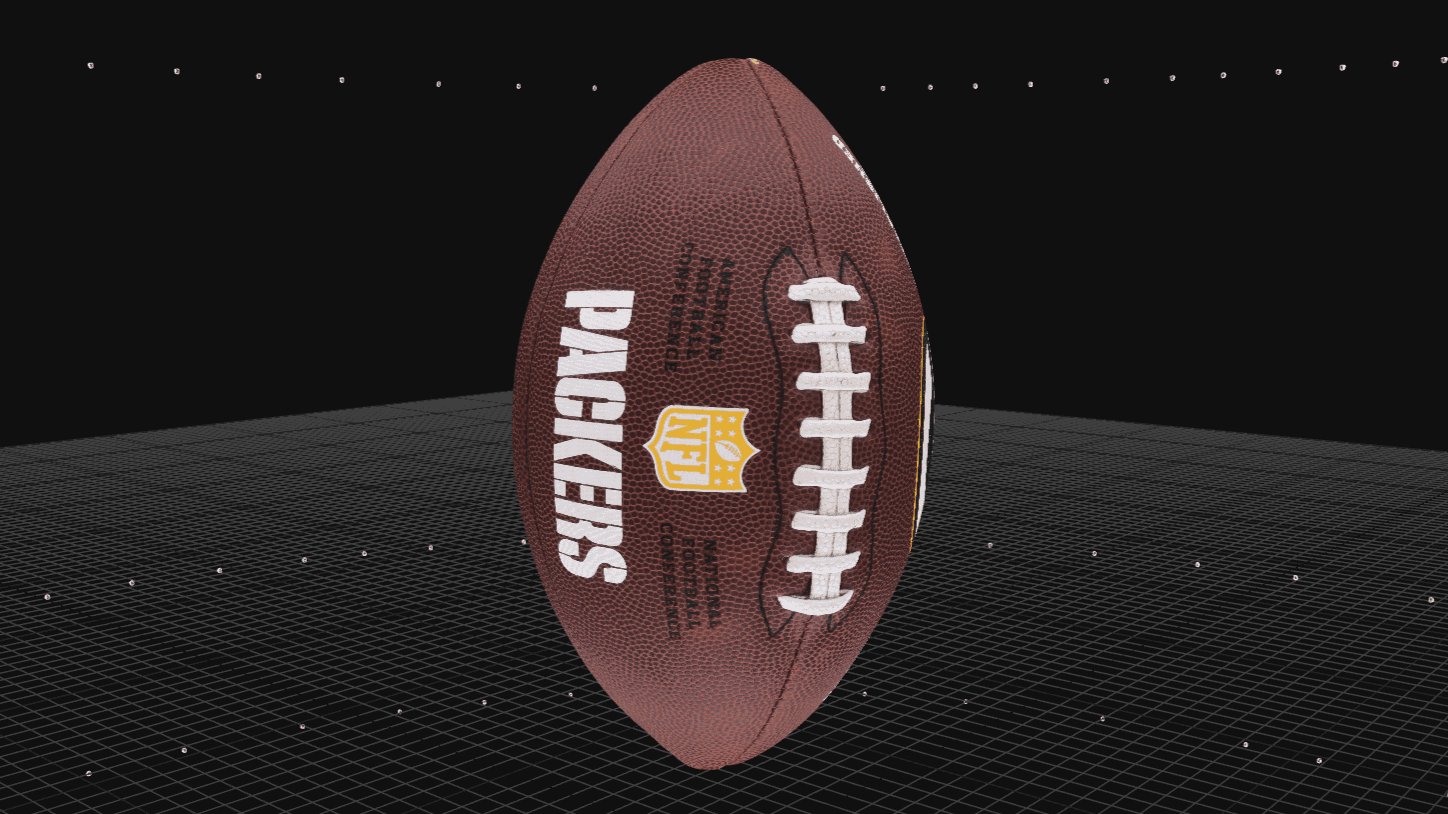
First: Create a High-Resolution Model
Start with a dense scan from photogrammetry. This version contains the most detail and serves as the base for all texture and map baking. Here we use the example of an American football, with all the bumps and grooves on the leather surface

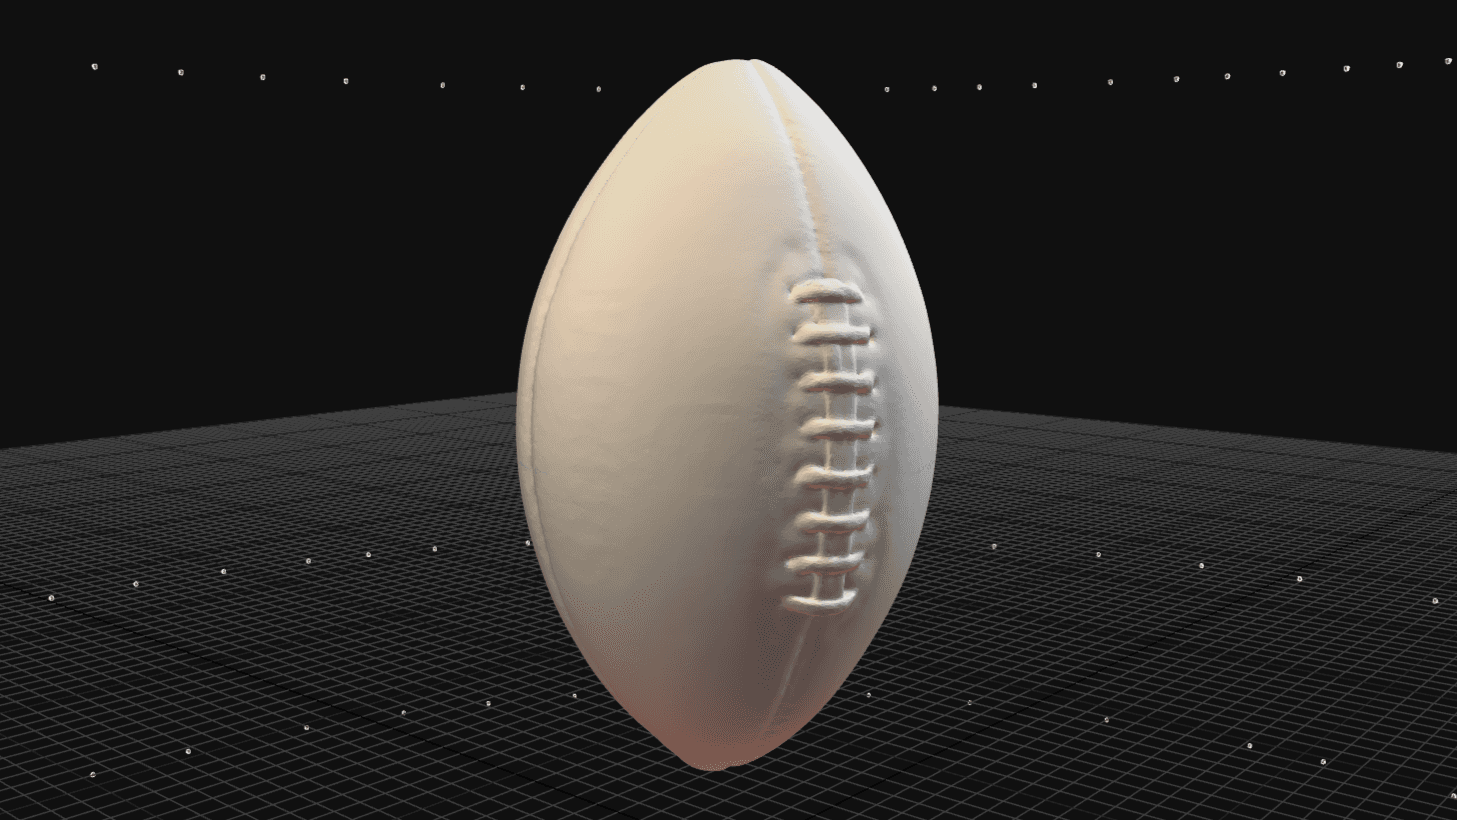
Second: Simplify and Smooth the Mesh
Reduce the polygon count to make the model lighter, requiring less computational power to work with:
Third: Bake the Normal Map
Create a normal map using your 3D or photogrammetry software. The software calculates the difference in surface detail and generates a texture that simulates it.

Fourth: Apply the Normal Map and Texture
Apply the baked normal map to the low-poly model. When rendered, the model will look nearly as detailed as the original, even though it has far fewer polygons.
Why Normal Maps Matter
Normal maps are an essential tool for achieving realism without compromising performance. They’re used in:
Video games and VR/AR to enable detailed environments on limited hardware.
Product visualization to keep 3D models lightweight for web and mobile.
Visual effects where artists need detailed models that can still be animated efficiently.
For teams working with 3D scans, normal maps also make it possible to publish or share assets online without uploading massive file sizes.
Conclusion
Normal mapping is one of the key techniques that bridges the gap between ultra-realistic scanned detail and practical, usable 3D assets. Especially when working with photogrammetry, it allows creators to preserve the essence of a scanned object’s surface, down to tiny cracks and pores, while delivering optimized models ready for real-time use.
Because at the end of the day, there’s no benefit to creating the most precise, highly detailed 3D model possible if no one can actually use it. Whether the end goal is a real-time application, a game engine, an AR experience or a lightweight web viewer, normal maps ensure your models remain accessible, functional and visually compelling, without sacrificing performance.